Tuesday, October 18, 2011

Recipe: Turkey Tetrazzini


So my friend Patti sent me an email and said,
"Hey Mrs. Super-housewife. I am looking for a recipe for dinner tonight. Do you know of something off the top of your head that uses ground turkey/meat and noodles? Preferably baked, but in the skillet would be good too." 
 (I couldn't resist including the oh-so-lovely complement...) I didn't have a recipe that was bake only, but I do have a Turkey Tetrazzini that is a little skillet and a little baking. Oh, and it's oh so yummy!

I wanted to know what Tetrazzini meant, imagining it's Italian and means something like "super duper delicious." Turns out it is an entirely American dish named after an opera star, Luisa Tetrazzini. Why someone decided to name a pasta dish after an opera star, I'll never know. But that doesn't make it any less tasty. All that being said, here's what you'll need:

10 ounces mushrooms, sliced thin (about 4 cups)
4 tablespoons unsalted butter
1/4 cup all-purpose flour
1 3/4 cups milk
2 cups chicken broth
1/4 cup dry white wine (or sherry)
10 ounces spaghetti
1pound ground turkey
1 can of green peas (drained)
2/3 cup Parmesan cheese
1/3 cup panko bread crumbs

Don't be intimidated by the long list of ingredients. Most of it I already had around the house anyway so that makes it pretty easy to throw together. So here's what you need to do.

Mushrooms and ground turkey browning together.
First, preheat the oven to 400*F. Put 4 tablespoons of butter in a large skillet and toss in the sliced mushrooms. Sautee them on a medium-medium high heat until they start to cook down a little (about 3-5 minutes), toss in the ground turkey. Cook until the turkey is cooked through and the liquid has cooked out some (about 5 more minutes). Sprinkle the flour throughout the pot and stir into the turkey and mushrooms. Stir well and let the flour cook for about 3 minutes. At this point, add the milk, chicken broth, and white wine/sherry. Bring to a boil, stir in 1/3 of the Parmesan cheese and can of drained peas and let simmer for about 5-7 minutes, until the sauce begins to thicken a little.

Golden brown and delicious!
While the mushroom sauce is simmering, start a large pot of boiling water to cook your pasta. When the water comes to a boil, add your pasta and follow the directions, cooking the pasta to al dente. Drain the pasta and dump into a buttered (or non-stick cooking spray) 9x13 shallow casserole dish. After the mushroom sauce has thickened slightly, dump it over the pasta and stir a little to incorporate. Sprinkle the 1/3 cup Parmesan that's left and the 1/3 cup panko breadcrumbs over the top of the casserole.

Put in the 400* oven and let bake for 30 minutes, or until bubbly and golden brown.

Here's a couple of notes on the recipe: When I was a kid, my Mom made an AMAZING Turkey Tetrazzini which is kind of what I was going for when I made this. My version came out just fine but I used a dry white wine instead of the sherry she usually used. (Because we live in a "damp" county, our nearest liquor store is 11 miles away and I didn't have any sherry on hand and didn't feel like driving to get some!) If you have sherry on hand, I would highly recommend it. It really gives it that classic Tetrazzini taste. If you don't have it, a dry white wine will work just fine.

The finished product is so good!
Also, this recipe works SO WELL with Thanksgiving leftover turkey. Instead of adding the ground turkey to cook with the mushrooms, wait till the mushrooms are done cooking and add the turkey (shredded or in small chunks) just after you add all the liquids. The leftover turkey is already cooked, so really, it just needs to be in there long enough to warm through.

Monday, October 17, 2011

Recipe: Creamy Crock-Pot Tex-Mex Chicken


Hamilton Beach
"Stay or Go" Slow Cooker
This may be the easiest dinner I've ever made. I hate when I find crock-pot recipes that require a lot of prep work, like chopping (and cooking!). I mean, isn't the point of crock-pots to make your life easier by making you cook LESS? So when I find a dump and go recipe, I'm much more apt to try it. This one is super simple.

Husband rating: 4 out of  5 stars
Kiddo rating: 5 out of 5 stars
Wife rating: 4 out of 5 stars (I want it spicier!)

I should start by saying that this recipe takes 6-8 hours in the crock-pot, so get this one going first thing, before work or school. We have a six quart Hamilton Beach "Stay or Go" Slow Cooker that we got from our friends for our wedding. (Thanks Robin and Ruben!) It's a fantastic slow cooker if you're looking for one. It latches the lid on so it's leak proof if you're taking it to and from functions! If you have a different size though, you might consider adjusting the amounts of chicken, in particular, but possibly the other ingredients as well.
Dump chicken in the bottom
of the crock-pot.

All that being said, here's what you'll need:

1 bag (2.5-3lbs) of frozen boneless, skinless chicken breasts
1 can yellow corn (drained)
1 can black beans (rinsed and drained)
1 can of rotel
1 brick of cream cheese

There are a couple options when it comes to the ingredients. I can't stand corn so I used hominy instead. I know lots of people don't like hominy though so it's totally up to you. Also, if you're not a black bean fan, use pinto beans instead. Either choice keeps with the Tex-Mex flair. The spiciness of the rotel is up to you as well. We have a kiddo around here so I went with the mild option but be brave and try the hot! If you're counting calories, feel free to use a low-fat cream cheese but do NOT use a fat-free. It will mess with the consistency of the final product.
Add in beans, corn, rotel and cream cheese.

So here's what you do: dump the bag of chicken into the pot. My bag was a 3lb bag but it was a LOT of chicken and there's only three of us here. So I used enough to cover the bottom of the crock-pot and had about 3 breasts left over. I'd say I used approximately 2.5 pounds of chicken. Then dump in the can of (drained) corn, (rinsed and drained) black beans, rotel and cream cheese. Make sure you drain the beans and corn really well. The dinner is soupy enough as it is and if you don't drain them, you really will be eating Tex-Mex Chicken Soup! Don't worry about everything being in separate piles. You'll stir it all together later.
Put the lid on and let cook for 5-6 hours.

Turn the crock-pot on low, put the lid on and let cook for about 5-6 hours. About every two hours, go in and give it a little stir. As the cream cheese begins to heat and the chicken begins to thaw, it becomes easier to stir it all together. Fair warning, the cream cheese will look chunky and curdled for a little while until it gets completely melted in. Don't worry like I did. It will get better!

Shred the chicken with two forks.
At the 5-6 hour mark, everything should be well stirred in and your house ought to be smelling amazing. (Who needs air fresheners when you have Tex-Mex cooking?) At this point for the last hour to two hours, I turned the crock-pot up to high to get it good and bubbly to make the sauce thicken some (remove the lid if needed). Check on it every once in a while and when it comes to the consistency you're looking for, you're ready to go! It will thicken a little once you serve it and it starts to cool, so keep that in mind. I like to shred the chicken when it's done to make it a little easier to serve. Just use two forks and pull the chicken breasts into shredded pieces.

Serve over white or brown rice and enjoy!

Wednesday, October 12, 2011

Recipe: The Green Smoothie

I'll admit, like many of my peers, I, too, have become obsessed with Pinterest. I've already successfully made two crafts I found on the site and I attempted another that was not so successful. I even have the makings of another craft that I just haven't started yet. But Pinterest is also good for recipes! I found a really simple, nutritious smoothie that was pretty tasty too!

Here's what you'll need:

1/2 cup frozen peaches (about 4-6 slices)
1/2 cup frozen mangoes (about 10-12 cubes)
2 handfuls of fresh spinach
1-2 bananas
water*

Put all the ingredients into a blender. Add a little water to get the consistency right and blend. *I used some of my diet citrus green tea in place of the water just to add another layer of fruity flavor.*

It's so easy and good for you. It's a great, slimy, green color. Add a gummy worm peeking over the top of the glass and you've got a great drink for the kiddos. Give it a try!

Wednesday, October 5, 2011

Recipe: Asian-style Turkey Lettuce Wraps

So here is a tasty AND healthy dish that's super easy and quick to make. I was inspired by the lettuce wraps I see in many restaurants but wanted to make them a little healthier though. So instead of chicken or beef, I substituted ground turkey and it's so good! And it got high marks from everyone!

Hubby rating: 5 out of 5 stars
Kid rating: 5 out of 5 stars
Mom rating: 5 out of 5 stars

So here's what you'll need:
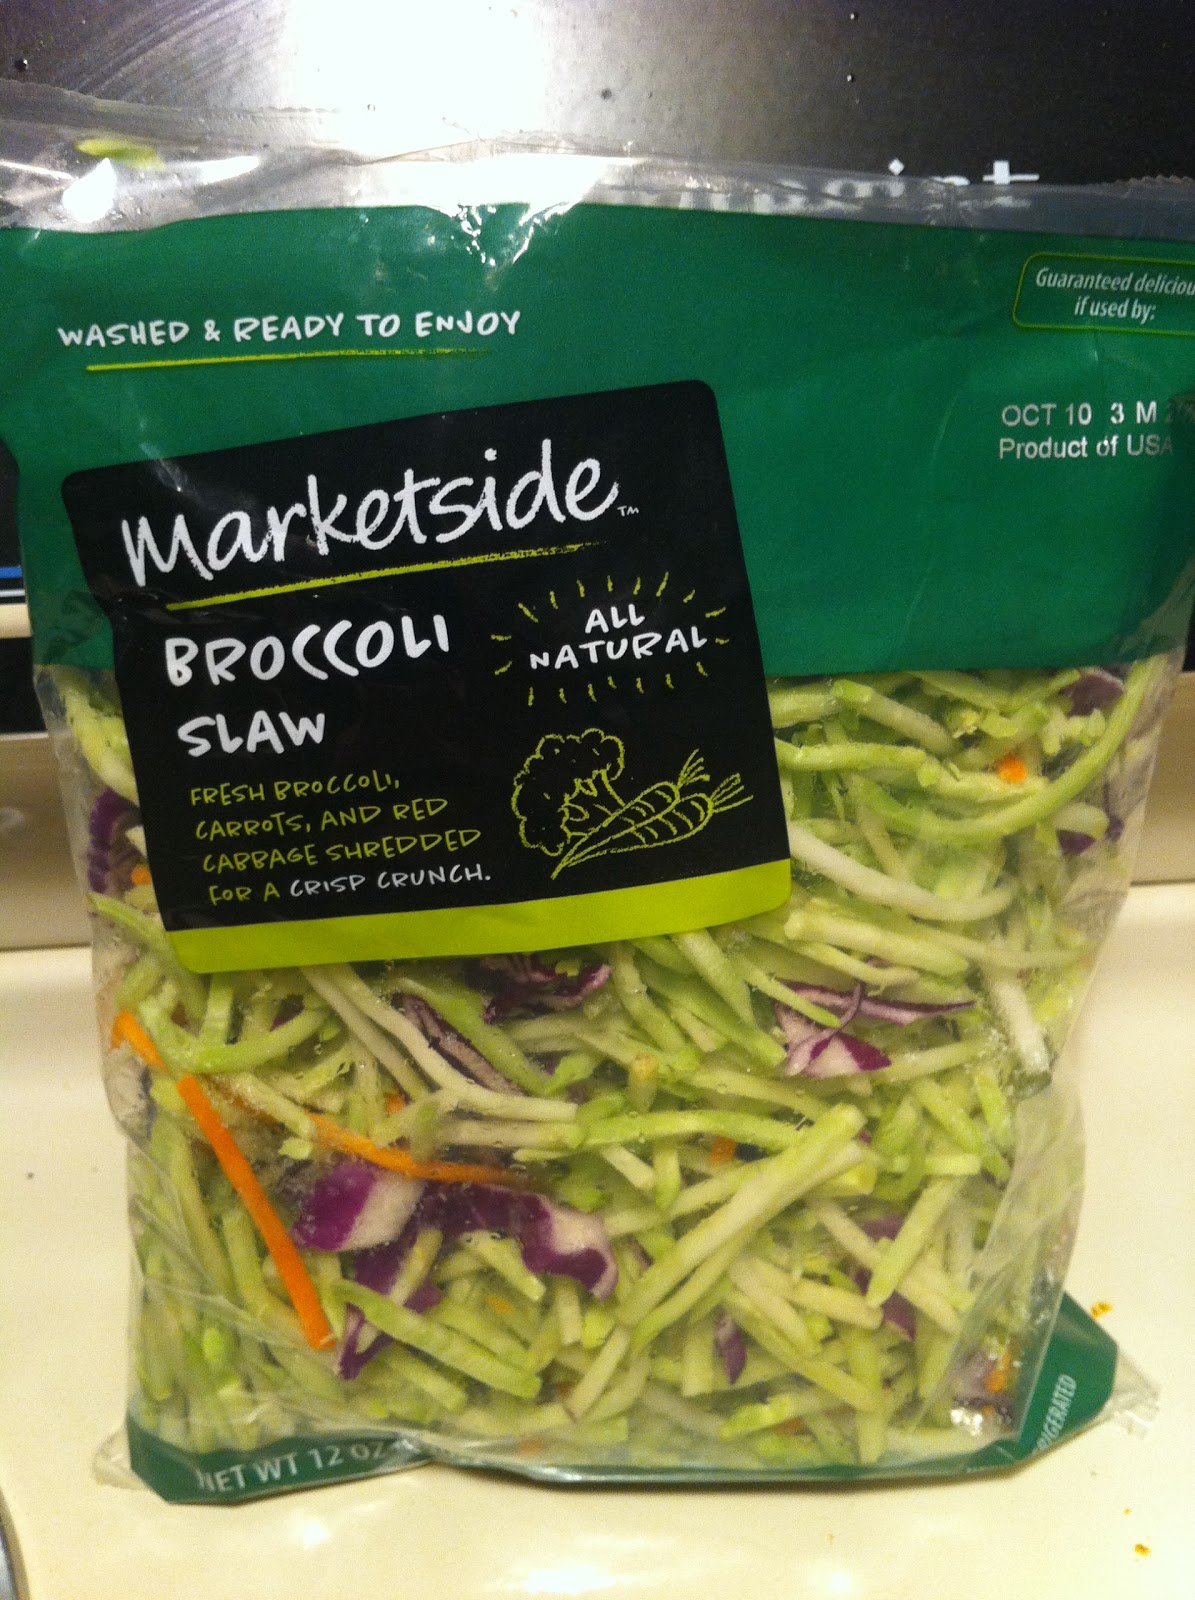
Look for the Broccoli Slaw
in the produce section at
Walmart or Target.

1 tablespoon sesame seed oil
1 pound ground turkey
1 bag broccoli slaw mix
1/4 cup soy sauce
1 tablespoon rice vinegar
1 head romaine lettuce
salt and pepper to taste

For garnish:
Crunchy chow mein noodles
Thai-style peanut sauce

Sesame Seed Oil and
Rice Vinegar really add the
Asian flavor!
In a big skillet, brown the ground turkey over medium to medium-high heat. Once the turkey is mostly cooked, add the bag of broccoli slaw mix and the sesame seed oil.

Two things- I get the broccoli slaw at Walmart but I've seen it at Target too. It's basically a mix of broccoli, carrots and other veggies, pre-chopped up and ready to cook. Also, I find that the sesame seed oil REALLY adds a lot of flavor. It comes in a small bottle on the Asian food aisle. It really gives the dish that Asian taste and is totally worth investing in for your pantry.
Simmer until the slaw starts to get soft.

Now back to the recipe!

Once the broccoli slaw starts to cook down and soften a little, add the soy sauce, vinegar, salt and pepper. Let it all simmer together until the broccoli slaw is cooked through.

Lay out your lettuce leafs and
get ready to pile on the tasty
goodness!
Meanwhile, wash your head of lettuce and pull off individual leaves and set them out on a plate. We usually use three leaves per person. I really like the tops of the leaves because they make better wrappers than the tougher ends. I usually tear off the tops for the wraps and save the ends for Hubby's sandwiches during the week.
Really great additions for taste
but watch the calories!
Pile the turkey/broccoli slaw on each leaf and top with some crunchy chow mein noodles and Thai-style peanut sauce. If you're concerned about calories, here's where you need to be careful. The noodles and sauce add a lot of calories so be sure to look at the labels and gauge how much you want to eat.

So yummy and so easy! Give it a try and let me know what you think!

Love and New Look

I'm loving doing the food blog. I hope you're enjoying it too. As you can see, I've been messing around with the look and design. Let me know what you think! And keep an eye out for a delicious new recipe coming soon!
Follow Me on Pinterest

Wednesday, September 28, 2011

Recipe: Garlic Hummus

I put the family on a diet recently because the hubby and I need to lose quite a few pounds and it never hurts to teach kids good eating habits. That being said, we've all come to the realization that we're snackers. We like to munch idly while doing homework, reading watching TV, etc. So my goal was to not necessarily eliminate snacking but to snack healthier.

My friend Patti suggested we try her hummus recipe. I'd had hummus before and I like it so at 35 calories per two tablespoon serving, I decided to give it a try. Use it with pita chips or with baby carrots for a great afternoon snack.

Hubby rating: 4 out of 5 stars
Kid rating: 3 out of 5 stars
Mom rating: 4 out of 5 stars

So here's what you need:

2 cans of drained chick peas (a.k.a. garbanzo beans)
~reserve some of the chick pea liquid
3 cloves minced garlic
1/2 cup tahini
1/4 cup lemon juice
salt and pepper to taste
green olive juice (optional)

After you drain the chick peas (saving some of the liquid for later), empty both cans into your blender or food processor. Add tahini, lemon juice, minced garlic and salt and pepper to taste. Pulse the blender until it starts to get smooth and creamy. If the dip is too thick, add a little of the chick pea liquid until the dip blends smoothly in the blender.

Note: the first time I made this, I happened to have some green olive juice on hand and used it in place of the chick pea liquid. It gave it a nice salty, tangy flavor and I really liked it a lot. If you have it on hand, give it a try.
Top with a drizzle of olive oil and some paprika to dress it up for a party!

Hummus is so yummy and easy to make and there are so many things you can do to change it up. Try adding sun-dried tomatoes, roasted red bell peppers, roasted pine nuts or fresh herbs to give it a different flavor every time!

Monday, September 26, 2011

Restaurant Review: The Brazilian Cowboy Steakhouse and Grill, Plano

The Brazilian Cowboy Steakhouse and Grill

$$- $10 to $20 per entree

1320 North Central Expressway
PlanoTX 75074
(972) 881-8600
www.braziliancowboy.com

Husband rating: 2 out of 5 stars
Wife rating: 2 out of 5 stars


What we ordered


Two adult dinner buffets
Flan
Papaya Creme


What We Thought


The hubby and I found ourselves kid-free on a Saturday night and since we've moved to Denton, we have a whole new area of the metroplex to explore. We opted for a movie in Plano and decided to try something new for dinner instead of familiar. We got on www.restaurant.com which is a great resource for dining discounts and a great way to find new and/or small independently owned places to eat. We decided to try The Brazilian Cowboy (http://bit.ly/q96e8r). It boasted traditional Brazilian Churrascaria at a fraction of the price of other Brazilian Steakhouses!" We're both big fans of Texas de Brazil so we thought it would be worth a try.


The salad bar was really disappointing. A typical lettuce mix with six different dressings and a few odd looking pasta and bean salads. They had a few hot options at the end that consisted of white rice and a few different stroganoff type sauces. They also had cinnamon-sugar covered bananas which was by far my favorite part of the whole meal. They also had these cheese rolls that were really good. I could have just eaten bread and bananas all night. :)


Hubby and I tried a few of the salad bar offerings but, being underwhelmed, moved quickly to the meats. For a small steakhouse they offered a decent selection of meat. Three different types of Picanha, the traditional Brazilian style meat, top sirloin, bacon wrapped chicken, sausage and a few others. The first piece of Picanha I had was the last one on the stick so it was WELL done and I don't usually like my meat that way so I had a few bites and set it aside. The flavor was great and not too salty like some churrascarias. The bacon wrapped chicken was wonderful but how bad can anything wrapped in bacon be? The garlic beef was really chewy. The sausage was ok. The next time the Picanha came around and they gave us a slice, it was so rare, I'd venture to call it raw. And I like my meat medium-rare so that's saying something.


We had our fill of meat and opted for desserts. (Hey! It was date night afterall...) Hubby got flan and I tried the Papaya Creme. Hubby enjoyed his flan and my Papaya Creme was ok. It basically was like a runny smoothie. The manager/owner came by and drizzled a sweet liquor over it and it made it a little better but I still probably wouldn't order it again. 


The manager, you could tell, was a hard-working man. He was busy running around the room making sure guests were happy. He even brought us a coffee made with his secret recipe (vanilla ice cream, coffee, Bailey's Irish Creme and Khalua) at no charge. It was pretty tasty and packed a decent punch. He really made the experience better.


All in all, I doubt we'll be going back. We both went to the movie stuffed full but at $18.95 per adult, I don't think it was worth it. I was glad we didn't pay full price for it or I'd have definitely been disappointed.