The Brazilian Cowboy Steakhouse and Grill
$$- $10 to $20 per entree
1320 North Central Expressway
Plano, TX 75074
(972) 881-8600
www.braziliancowboy.com
Husband rating: 2 out of 5 stars
Wife rating: 2 out of 5 stars
What we ordered
Two adult dinner buffets
Flan
Papaya Creme
What We Thought
The hubby and I found ourselves kid-free on a Saturday night and since we've moved to Denton, we have a whole new area of the metroplex to explore. We opted for a movie in Plano and decided to try something new for dinner instead of familiar. We got on www.restaurant.com which is a great resource for dining discounts and a great way to find new and/or small independently owned places to eat. We decided to try The Brazilian Cowboy (http://bit.ly/q96e8r). It boasted traditional Brazilian Churrascaria at a fraction of the price of other Brazilian Steakhouses!" We're both big fans of Texas de Brazil so we thought it would be worth a try.
The salad bar was really disappointing. A typical lettuce mix with six different dressings and a few odd looking pasta and bean salads. They had a few hot options at the end that consisted of white rice and a few different stroganoff type sauces. They also had cinnamon-sugar covered bananas which was by far my favorite part of the whole meal. They also had these cheese rolls that were really good. I could have just eaten bread and bananas all night. :)
Hubby and I tried a few of the salad bar offerings but, being underwhelmed, moved quickly to the meats. For a small steakhouse they offered a decent selection of meat. Three different types of Picanha, the traditional Brazilian style meat, top sirloin, bacon wrapped chicken, sausage and a few others. The first piece of Picanha I had was the last one on the stick so it was WELL done and I don't usually like my meat that way so I had a few bites and set it aside. The flavor was great and not too salty like some churrascarias. The bacon wrapped chicken was wonderful but how bad can anything wrapped in bacon be? The garlic beef was really chewy. The sausage was ok. The next time the Picanha came around and they gave us a slice, it was so rare, I'd venture to call it raw. And I like my meat medium-rare so that's saying something.
We had our fill of meat and opted for desserts. (Hey! It was date night afterall...) Hubby got flan and I tried the Papaya Creme. Hubby enjoyed his flan and my Papaya Creme was ok. It basically was like a runny smoothie. The manager/owner came by and drizzled a sweet liquor over it and it made it a little better but I still probably wouldn't order it again.
The manager, you could tell, was a hard-working man. He was busy running around the room making sure guests were happy. He even brought us a coffee made with his secret recipe (vanilla ice cream, coffee, Bailey's Irish Creme and Khalua) at no charge. It was pretty tasty and packed a decent punch. He really made the experience better.
All in all, I doubt we'll be going back. We both went to the movie stuffed full but at $18.95 per adult, I don't think it was worth it. I was glad we didn't pay full price for it or I'd have definitely been disappointed.
"This is my invariable advice to people: Learn how to cook- try new recipes, learn from your mistakes, be fearless, and above all have fun!" ~Julia Child
Monday, September 26, 2011
Saturday, September 17, 2011
Recipe: Tasty Turkey Surprise
This recipe is fantastic! It's fabulously healthy and it tastes amazing. I didn't think those two things ever went together. And on top of that, it's easy to make!
Hubby rating: 4 out of 5 stars
Kid rating: 4 out of 5 stars
Mom rating: 5 out of 5 stars
So here's what you'll need:
2 tablespoons olive oil
1 onion (finely chopped)
1 bag of spinach
1 package of ground turkey
1 can of beans (drained)
2 cups chicken stock (or water with chicken bullion)
salt and pepper to taste
First, in a large skillet, put two tablespoons of olive oil and set to medium/medium-high. Once the oil is hot, add the chopped onion. Saute until the onions are translucent and start to get soft. Then add the ground turkey. Brown the turkey until cooked through. (Note: ground turkey never really seems to brown. Just make sure all the pink is gone.)
Once the turkey is cooked, add the two cups of chicken stock. Bring it to a boil. Mix in the spinach a little at a time. (Note: you'll probably wonder how in the world a whole bag of spinach will fit in the pan, but if you add a little at a time and let it cook down, it will all fit. I promise!)
Add the can of drained beans. The first time I made this recipe, I made it with cannelloni beans. This time, I made it with black beans. It would work well with almost any bean of your choice.
Add salt and pepper to taste. If you used low sodium chicken stock, you'll probably need more salt than if you used regular stock.
Simmer until most of the liquid is gone and then serve. I usually serve it over white rice.
This recipe makes four large servings and with the rice, it's under 500 calories! Without the rice, a serving is only 332 calories! Husband gives this a 4 out of 5 stars and kid gives it a 5 out of 5! You can't hardly beat that!
Enjoy and happy cooking!
Hubby rating: 4 out of 5 stars
Kid rating: 4 out of 5 stars
Mom rating: 5 out of 5 stars
So here's what you'll need:
2 tablespoons olive oil
1 onion (finely chopped)
1 bag of spinach
1 package of ground turkey
1 can of beans (drained)
2 cups chicken stock (or water with chicken bullion)
salt and pepper to taste
![]() |
| Simmer until most of the liquid is gone. |
Once the turkey is cooked, add the two cups of chicken stock. Bring it to a boil. Mix in the spinach a little at a time. (Note: you'll probably wonder how in the world a whole bag of spinach will fit in the pan, but if you add a little at a time and let it cook down, it will all fit. I promise!)
Add the can of drained beans. The first time I made this recipe, I made it with cannelloni beans. This time, I made it with black beans. It would work well with almost any bean of your choice.
Add salt and pepper to taste. If you used low sodium chicken stock, you'll probably need more salt than if you used regular stock.
Simmer until most of the liquid is gone and then serve. I usually serve it over white rice.
This recipe makes four large servings and with the rice, it's under 500 calories! Without the rice, a serving is only 332 calories! Husband gives this a 4 out of 5 stars and kid gives it a 5 out of 5! You can't hardly beat that!
Enjoy and happy cooking!
Wednesday, September 14, 2011
Recipe: Salted Chocolate Espresso Caramel Bars
![]() |
| A close up of the chocolaty goodness! |
Hubby rating: 4 out of 5 stars
Kid rating: 5 out of 5 stars
Mom rating: 5 out of 5 stars but only because I can't give it a 10!
Salted Chocolate Espresso Caramel Bars
Step one: The crust
In this step, you're going to make a graham cracker crust the same way you would for a cheesecake. You'll need:
12 graham crackers
1/4 cup of sugar
1 1/2 sticks melted butter
Preheat the oven to 350*. Put the graham crackers and the sugar in a food processor or blender and blend until you have fine crumbs. Mix the crumbs and the butter together in a bowl until clumps start to form and all the crumbs look coated. Line a 9" spring form pan with parchment or wax paper. Spray the paper and the sides of the pan with non-stick cooking spray. Spread the graham cracker mixture into the pan so that it's even all around. Bake the crust for 10-12 minutes or until it looks golden brown. Let it cool completely. (To make this happen faster, I set it in the fridge for about 20 minutes.)
Step two: The caramel
In this step it is HIGHLY recommended that you use a candy thermometer. I didn't have one so I used my meat thermometer. It didn't read high enough so my caramel's temperature got a little too high. Instead of having a creamy, melt in your mouth caramel, it ended up being more like toffee. Which was fine because it was crunchy and delicious but the idea is to have a smooth texture.
You'll need:
1/2 cup heavy whipping cream
1 stick room temperature butter
1 tablespoon of water
1 1/2 cups packed brown sugar
In a medium saucepan, combine cream, butter, water and sugar and stir over medium heat until smooth. Bring to a boil and cook, without stirring, until the caramel reached 240*. It takes about 5-7 minutes but make sure to watch it so it doesn't turn to toffee (unless you want it to!) Pour the caramel over the cooled graham cracker crust.
Let it cool in the fridge for 20 minutes and then in the freezer until firm (about 10 more minutes).
Step three: The chocolate
In this step, we're going to make the chocolate espresso ganache. You'll need:
2 cups semisweet chocolate chips
1/2 cup heavy whipping cream
2 teaspoons instant coffee
smoked sea salt
Place a glass bowl over a pot of hot water. Bring the water to a boil. Add the chocolate chips and cream and stir until they melt and combine. Mix in the instant coffee powder. Once completely mixed and smooth, pour over the cooled caramel. Sprinkle the smoked sea salt all over the chocolate so that the whole pan has a little bit of salt. Refrigerate for at least one hour.
Bring out about 30 minutes before you want to serve and allow to come to room temperature. Using a slightly wet knife, cut around the edge of the pan to release the chocolate layer. Release the side of the springform pan and remove from the bottom. Cut into 1" by 1 1/2" bars.
![]() |
| The bars after removing the sides of the pan. |
These are SO yummy. My husband, daughter and friends who were lucky enough to try these were in awe. Even with the toffee textured caramel!
Wednesday, August 10, 2011
Recipe: Easy Smoked Sea Salt!
Chaos erupted in our household lately so the foodie blog was set aside for a while but I'm BACK! And I have an easy new recipe for you.
I have plans to try a new recipe out on my family this week but the recipe called for smoked sea salt and of course, it only called for a sprinkle of it. I looked for it online because I hadn't consciously seen it in my local supermarket and wanted to see how rare it was. Turns out it is relatively easy to find but it's expensive! You can get 6oz of it for only $13. (Artisan Salt Company- Durango Hickory Smoked Salt) I realize that $13 wont break anyone's bank but since I only needed a sprinkle, I wanted to see how to make the stuff myself.
I found a few recipes that use a grill with hickory or mesquite chips and a foil pan of salt. It looked like it was pretty easy but I live in an apartment now and we don't have a covered grill. So I needed an alternative. So here's what I did.
Smoked Sea Salt- The Easy Way!
1/2 cup of course sea salt
1 tablespoon of liquid smoke
Mix the salt and liquid smoke together in a small bowl and then spread out on a foil lined cookie sheet. Put in the oven on the lowest temperature setting. (My oven's lowest was 200*.) Leave in the oven for about an hour or until the salt appears dry. You may want to stir the salt around once just to get it good and dry. Remove from the oven and let set until cool. Once cool, place into a closed container.
Note: Make sure you have a course salt otherwise, it will just dissolve in the liquid smoke. Liquid smoke comes in several different flavors. My recipe called for Mesquite so that's what I used.
When you use it, if you want a finer grain salt, put it into a salt grinder. I used my Magic Bullet to pulse it into a finer salt and it worked great!
This method worked beautifully and it made the whole place smell like we were having one amazing barbecue!
I have plans to try a new recipe out on my family this week but the recipe called for smoked sea salt and of course, it only called for a sprinkle of it. I looked for it online because I hadn't consciously seen it in my local supermarket and wanted to see how rare it was. Turns out it is relatively easy to find but it's expensive! You can get 6oz of it for only $13. (Artisan Salt Company- Durango Hickory Smoked Salt) I realize that $13 wont break anyone's bank but since I only needed a sprinkle, I wanted to see how to make the stuff myself.
![]() |
| Sea Salt, mixed and spread out on the cookie sheet ready for cooking! |
Smoked Sea Salt- The Easy Way!
1/2 cup of course sea salt
1 tablespoon of liquid smoke
![]() |
| Liquid Smoke comes in different flavors. I used Mesquite. |
Note: Make sure you have a course salt otherwise, it will just dissolve in the liquid smoke. Liquid smoke comes in several different flavors. My recipe called for Mesquite so that's what I used.
When you use it, if you want a finer grain salt, put it into a salt grinder. I used my Magic Bullet to pulse it into a finer salt and it worked great!
![]() |
| The finished product! |
Wednesday, July 27, 2011
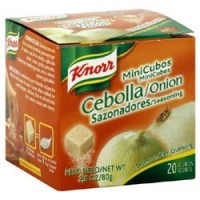
Product Review: Knorr Mini Cubes
Product: Knorr Mini Cubes (in different varieties)
Price: around $1.14
Purchased at: Walmart/Kroger
These are my favorite spices to cook with! I originally found them at Kroger but I've also found them at Walmart. You'll find them on the Mexican aisle at both stores. What they are is little cubes of spices in a foil wrapper. They remind me a lot of the chicken bullion cubes my mom used to buy when I was a kid. I've found them in four varieties- onion, garlic, chipotle and cilantro.
I love Chipotle's cilantro-lime rice and I make it a lot. So in passing by these little boxes of awesome, I stopped to take a look and decided to give them a try. I tossed a cube of cilantro in with the boiling water/lime juice and cooked the rice as usual. Twenty minutes later, I had amazing (maybe better than Chipotle's) cilantro-lime rice! I've also used the chipotle flavor in rice. It's got a slight kick to it and it has great flavor!
Another way I like to use them, is to grind them up (The cubes are a little hard so I toss them into my Magic Bullet and let it get it down to a fine powder.) and use them with a little flour to coat chicken or fish for an easy pan-fried dinner.
The onion and garlic varieties add a wonderful flavor to soups.
It's always best to add them to a liquid (so they'll dissolve) unless you grind them up really well. Then they fare just fine in anything.
At $1.14 at Walmart, you just can't beat it. A jar of dried cilantro will run you between $3-4 easily so this is really a steal. Give them a try and let me know what you think!
A side note: for some strange reason, Knorr does not have these on their website. I can't imagine why because they're amazing. They DO have recipes on their website that use them as ingredients though. The only thing I can think of is that because it's considered a "Mexican" product, it is not listed on their regular website. I looked for an international site and was unable to find anything.
If you can't find them in your grocery store, you can find them for sale online easily by either using www.shopping.google.com or going straight to Amazon.com and searching for "Knorr minicubes."
Happy cooking!
Price: around $1.14
Purchased at: Walmart/Kroger
These are my favorite spices to cook with! I originally found them at Kroger but I've also found them at Walmart. You'll find them on the Mexican aisle at both stores. What they are is little cubes of spices in a foil wrapper. They remind me a lot of the chicken bullion cubes my mom used to buy when I was a kid. I've found them in four varieties- onion, garlic, chipotle and cilantro.
I love Chipotle's cilantro-lime rice and I make it a lot. So in passing by these little boxes of awesome, I stopped to take a look and decided to give them a try. I tossed a cube of cilantro in with the boiling water/lime juice and cooked the rice as usual. Twenty minutes later, I had amazing (maybe better than Chipotle's) cilantro-lime rice! I've also used the chipotle flavor in rice. It's got a slight kick to it and it has great flavor!
Another way I like to use them, is to grind them up (The cubes are a little hard so I toss them into my Magic Bullet and let it get it down to a fine powder.) and use them with a little flour to coat chicken or fish for an easy pan-fried dinner.The onion and garlic varieties add a wonderful flavor to soups.
It's always best to add them to a liquid (so they'll dissolve) unless you grind them up really well. Then they fare just fine in anything.
At $1.14 at Walmart, you just can't beat it. A jar of dried cilantro will run you between $3-4 easily so this is really a steal. Give them a try and let me know what you think!
A side note: for some strange reason, Knorr does not have these on their website. I can't imagine why because they're amazing. They DO have recipes on their website that use them as ingredients though. The only thing I can think of is that because it's considered a "Mexican" product, it is not listed on their regular website. I looked for an international site and was unable to find anything.
If you can't find them in your grocery store, you can find them for sale online easily by either using www.shopping.google.com or going straight to Amazon.com and searching for "Knorr minicubes."
Happy cooking!
Friday, July 15, 2011
Restaurant Review: The Red Cactus, Fort Worth
The Red Cactus
Open daily, 9a-9p
My shrimp fajitas were pretty good. The shrimp was perfectly cooked and although they were tiny shrimp, there were plenty of them. They came on a bed of sauteed red onions and green bell peppers that were cooked just enough to be soft but with a little bit of crunch still left in them. The portion size was more than enough and at $8.99, I feel like I got my money's worth. That being said, it didn't have a lot of flavor. It tasted good but didn't leave anything memorable.
Josh's tacos looked good. I really liked that they grilled the soft taco shells to give them a little crisp. But he reported them to be rather bland, supporting my opinion of my fajitas as well. Good, but not great.
Anna was done with her dinner before Josh and I hardly got started. She loved the cup of queso to dip her flautitas in and the bland flavors were perfect to not assault her kid pallet with spicy flavors. It's definitely a family friendly venue.
The margaritas were nothing to write home about. Initially they tasted pretty good, but there was so much salt on the rim (HUGE salt flakes!) that by the time we were less than half way through it pretty much tasted like salty water.
The tastiest thing we had there tonight was by FAR the green chile sauce, nonchalantly served on the side of our dinners. It was mild but really yummy. It gave the tacos and the fajitas a little bit a life!
Try it out and let me know what you think!
$- under $10 per entree
3005 South University Drive
Fort Worth, TX 76109-5608
(817) 927-2933
Fort Worth, TX 76109-5608
Husband rating: 2 out of 5 stars
Wife rating: 3 out of 5 stars
Kid rating: 4 out of stars
The family and I went out to dinner tonight and we decided to try The Red Cactus. It's on University Drive just across from TCU. We've driven past several times and have wanted to try it so when Josh requested Mexican, we headed that way.
What We Ordered
Me- Shrimp fajitas on a bed of sauteed peppers and onions. Served with hot tortillas, rice, beans, sour cream, guacamole, and salsa.
Josh- Tacos Planchados, four grilled flour tortillas stuffed with shredded beef, refried beans, and Monterrey Jack and Cheddar. Served with rice and beans.
Anna- Kids flautitas, crispy shredded beef taquitos. Served with queso, rice and beans.
Chips and salsa and two margaritas
What We Thought
There are two kinds of restaurants in the TCU area- hoity-toity, high priced dining and casual, student and family friendly dives. This place is definitely the latter. It's a cute place, with brightly colored walls (including a TCU purple wall) and modern art prints hung along the long wall. There's a cute little patio in the back that would be perfect for late night hang outs (although I think I'll wait till the weather is a lot cooler!) The atmosphere was really nice and we were greeted warmly when we walked in.
My shrimp fajitas were pretty good. The shrimp was perfectly cooked and although they were tiny shrimp, there were plenty of them. They came on a bed of sauteed red onions and green bell peppers that were cooked just enough to be soft but with a little bit of crunch still left in them. The portion size was more than enough and at $8.99, I feel like I got my money's worth. That being said, it didn't have a lot of flavor. It tasted good but didn't leave anything memorable.
Josh's tacos looked good. I really liked that they grilled the soft taco shells to give them a little crisp. But he reported them to be rather bland, supporting my opinion of my fajitas as well. Good, but not great.
Anna was done with her dinner before Josh and I hardly got started. She loved the cup of queso to dip her flautitas in and the bland flavors were perfect to not assault her kid pallet with spicy flavors. It's definitely a family friendly venue.
The margaritas were nothing to write home about. Initially they tasted pretty good, but there was so much salt on the rim (HUGE salt flakes!) that by the time we were less than half way through it pretty much tasted like salty water. The tastiest thing we had there tonight was by FAR the green chile sauce, nonchalantly served on the side of our dinners. It was mild but really yummy. It gave the tacos and the fajitas a little bit a life!
All in all, I think I'd be happy to eat there again. I want to try the Faji-Papa which is like a Mexican-style loaded baked potato. I don't think I'd go out of my way to eat there, but if we were in the area, I wouldn't turn it down.
Thursday, July 14, 2011
Foodie!
My Auntie Jan has always claimed she'd rather be fat and happy than thin and miserable. I never planned on adopting that mantra but it seems it's been imprinted in my attitude towards life. That being said, I LOVE FOOD! I love to cook food. I love to eat food. I love to watch people cook food. I have a passion for all things edible.
Enter the blog. I know there are a billion foodie blogs out there but I don't care. A lot of times, when I mention what I've made for dinner, many of my friends ask for the recipe. So when I stumble upon something tasty, you'll find it here. If I find an awesome product out there, I'll tell you what I think here. Also, if I find a restaurant somewhere with exceptional fare, you'll hear about it here. (You'll probably hear about the bad ones too!)
So tonight, here's a simple recipe that'll spice up your Mexican food night at home! I call it "Rice and Beans, Beans and Rice." It's a reference to Dave Ramsey's financial plan that tells new savers to live on beans and rice to save money. While I could never live only on beans and rice, this recipe is pretty good!
I'm also going to include what I'd like to call "The Husband Rating." My hubby likes to eat food as much as I do. He'll give the recipes/restaurants a one to five star rating. Hopefully, I'll score high! (P.S. You'll find my rating, as well as a rating from my six year old daughter there too!)
Rice and Beans, Beans and Rice
Husaband rating: 4 out of 5 stars
Wife rating: 4 out of 5 stars
Kid rating: 1 out of 5 stars (She doesn't like tomatoes!)
1 can diced tomatoes
1 can black beans
Approx. 1 1/2 cups water
salt to taste
1 cup of white long grain rice
Note: A typical rice recipe calls for two cups of water to one cup of rice. If you have a bigger crowd to feed, increase your measurements. Just be sure to keep the 2 to 1 ratio.
Open the can of tomatoes and empty the juice into a 4 cup measuring cup. It'll probably give you 1/4-1/2 cup of juice. You need a total of two cups of liquid so fill the rest of the way to two cups with water. (I like to fill the tomato can with water a few times, draining them each time, to get as much tomatoey goodness out of the can as I can.)
Pour the two cups of liquid into your favorite rice pot. Drain and rinse the black beans and add to the pot. Add the diced tomatoes. Salt to taste. (I like to use garlic salt to give it a little extra flavor, but regular salt is great too!)
Bring the pot to a boil. Once boiling, add 1 cup of white, long-grain rice. Let it come back up to a boil. Then cover, TURN TO LOW, and cook for twenty minutes.
After twenty minutes, fluff and mix rice and beans with a fork. Serve hot!
EXTRAS!
If you want to add a little extra flavor, in the Mexican aisle at the grocery store, you can get tomato consume. It's kind of like a bullion cube but with tomato flavor instead of chicken or beef. Break it up to help it dissolve and add it at the beginning when you add the salt.
Also, for a little spice, add some red pepper flakes when you add the salt. Beware! A little goes a long way!
Enter the blog. I know there are a billion foodie blogs out there but I don't care. A lot of times, when I mention what I've made for dinner, many of my friends ask for the recipe. So when I stumble upon something tasty, you'll find it here. If I find an awesome product out there, I'll tell you what I think here. Also, if I find a restaurant somewhere with exceptional fare, you'll hear about it here. (You'll probably hear about the bad ones too!)
So tonight, here's a simple recipe that'll spice up your Mexican food night at home! I call it "Rice and Beans, Beans and Rice." It's a reference to Dave Ramsey's financial plan that tells new savers to live on beans and rice to save money. While I could never live only on beans and rice, this recipe is pretty good!
I'm also going to include what I'd like to call "The Husband Rating." My hubby likes to eat food as much as I do. He'll give the recipes/restaurants a one to five star rating. Hopefully, I'll score high! (P.S. You'll find my rating, as well as a rating from my six year old daughter there too!)
Rice and Beans, Beans and Rice
Husaband rating: 4 out of 5 stars
Wife rating: 4 out of 5 stars
Kid rating: 1 out of 5 stars (She doesn't like tomatoes!)
1 can diced tomatoes
1 can black beans
Approx. 1 1/2 cups water
salt to taste
1 cup of white long grain rice
Note: A typical rice recipe calls for two cups of water to one cup of rice. If you have a bigger crowd to feed, increase your measurements. Just be sure to keep the 2 to 1 ratio.
Open the can of tomatoes and empty the juice into a 4 cup measuring cup. It'll probably give you 1/4-1/2 cup of juice. You need a total of two cups of liquid so fill the rest of the way to two cups with water. (I like to fill the tomato can with water a few times, draining them each time, to get as much tomatoey goodness out of the can as I can.)
Pour the two cups of liquid into your favorite rice pot. Drain and rinse the black beans and add to the pot. Add the diced tomatoes. Salt to taste. (I like to use garlic salt to give it a little extra flavor, but regular salt is great too!)
Bring the pot to a boil. Once boiling, add 1 cup of white, long-grain rice. Let it come back up to a boil. Then cover, TURN TO LOW, and cook for twenty minutes.
After twenty minutes, fluff and mix rice and beans with a fork. Serve hot!
EXTRAS!
If you want to add a little extra flavor, in the Mexican aisle at the grocery store, you can get tomato consume. It's kind of like a bullion cube but with tomato flavor instead of chicken or beef. Break it up to help it dissolve and add it at the beginning when you add the salt.
Also, for a little spice, add some red pepper flakes when you add the salt. Beware! A little goes a long way!
Subscribe to:
Posts (Atom)